Automated Message Settings
Introduction
The Automated Messages Settings page in Blinksale allows you to customize the content and timing of emails sent to your clients throughout the billing process. By personalizing these messages, you can maintain consistent communication, reflect your brand’s voice, and provide clear information to your clients about estimates, invoices, payment reminders, and payment confirmations.Understanding Automated Messages
Automated messages in Blinksale are email templates that:- Automatically send when specific events occur (e.g., when sending an invoice)
- Can be personalized with client and document information using variables
- Include subject lines and message content that you can customize
- Can be enabled or disabled based on your preferences
Types of Automated Messages
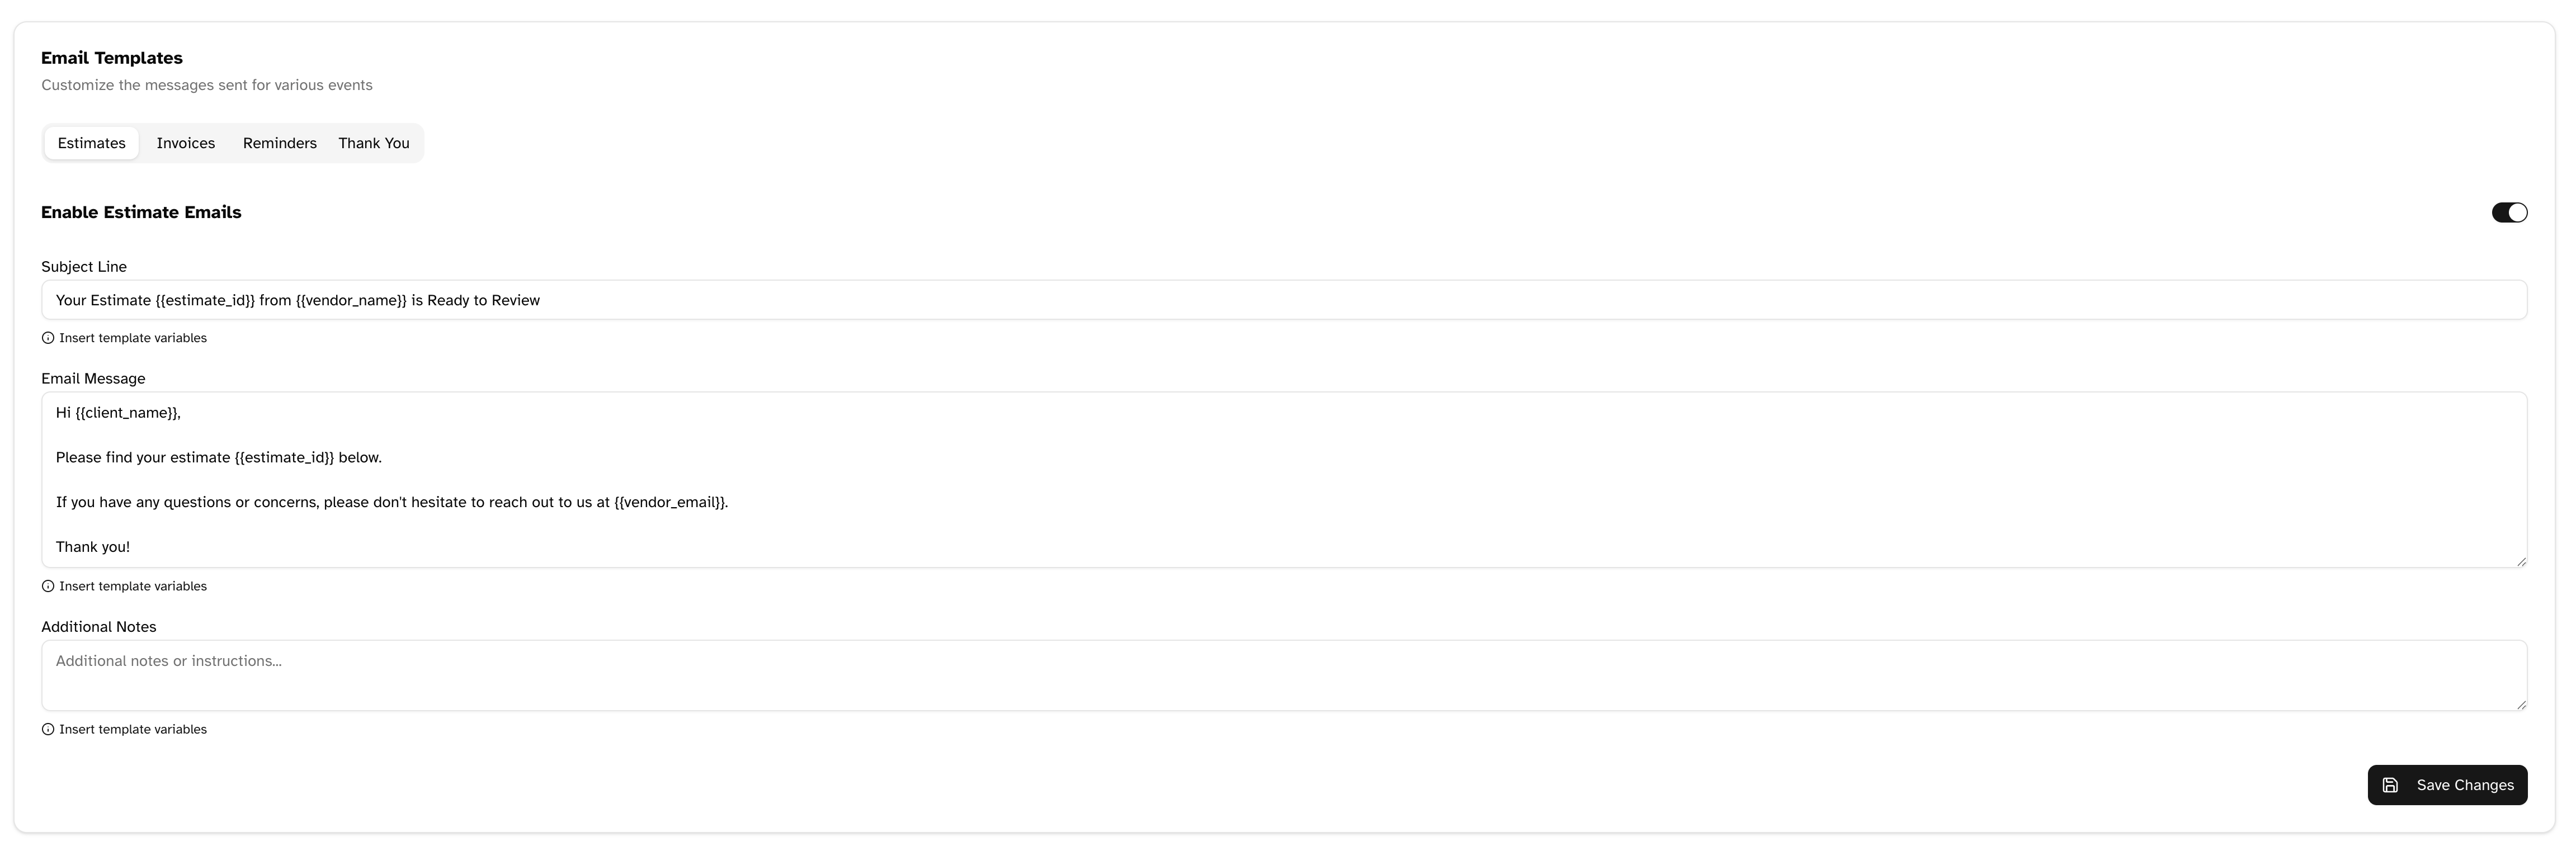
Blinksale offers four categories of automated messages:Estimate Messages
These emails are sent when you share an estimate with a client. They typically include:- A professional introduction
- The estimate details
- Instructions for reviewing and approving
- Your contact information for questions
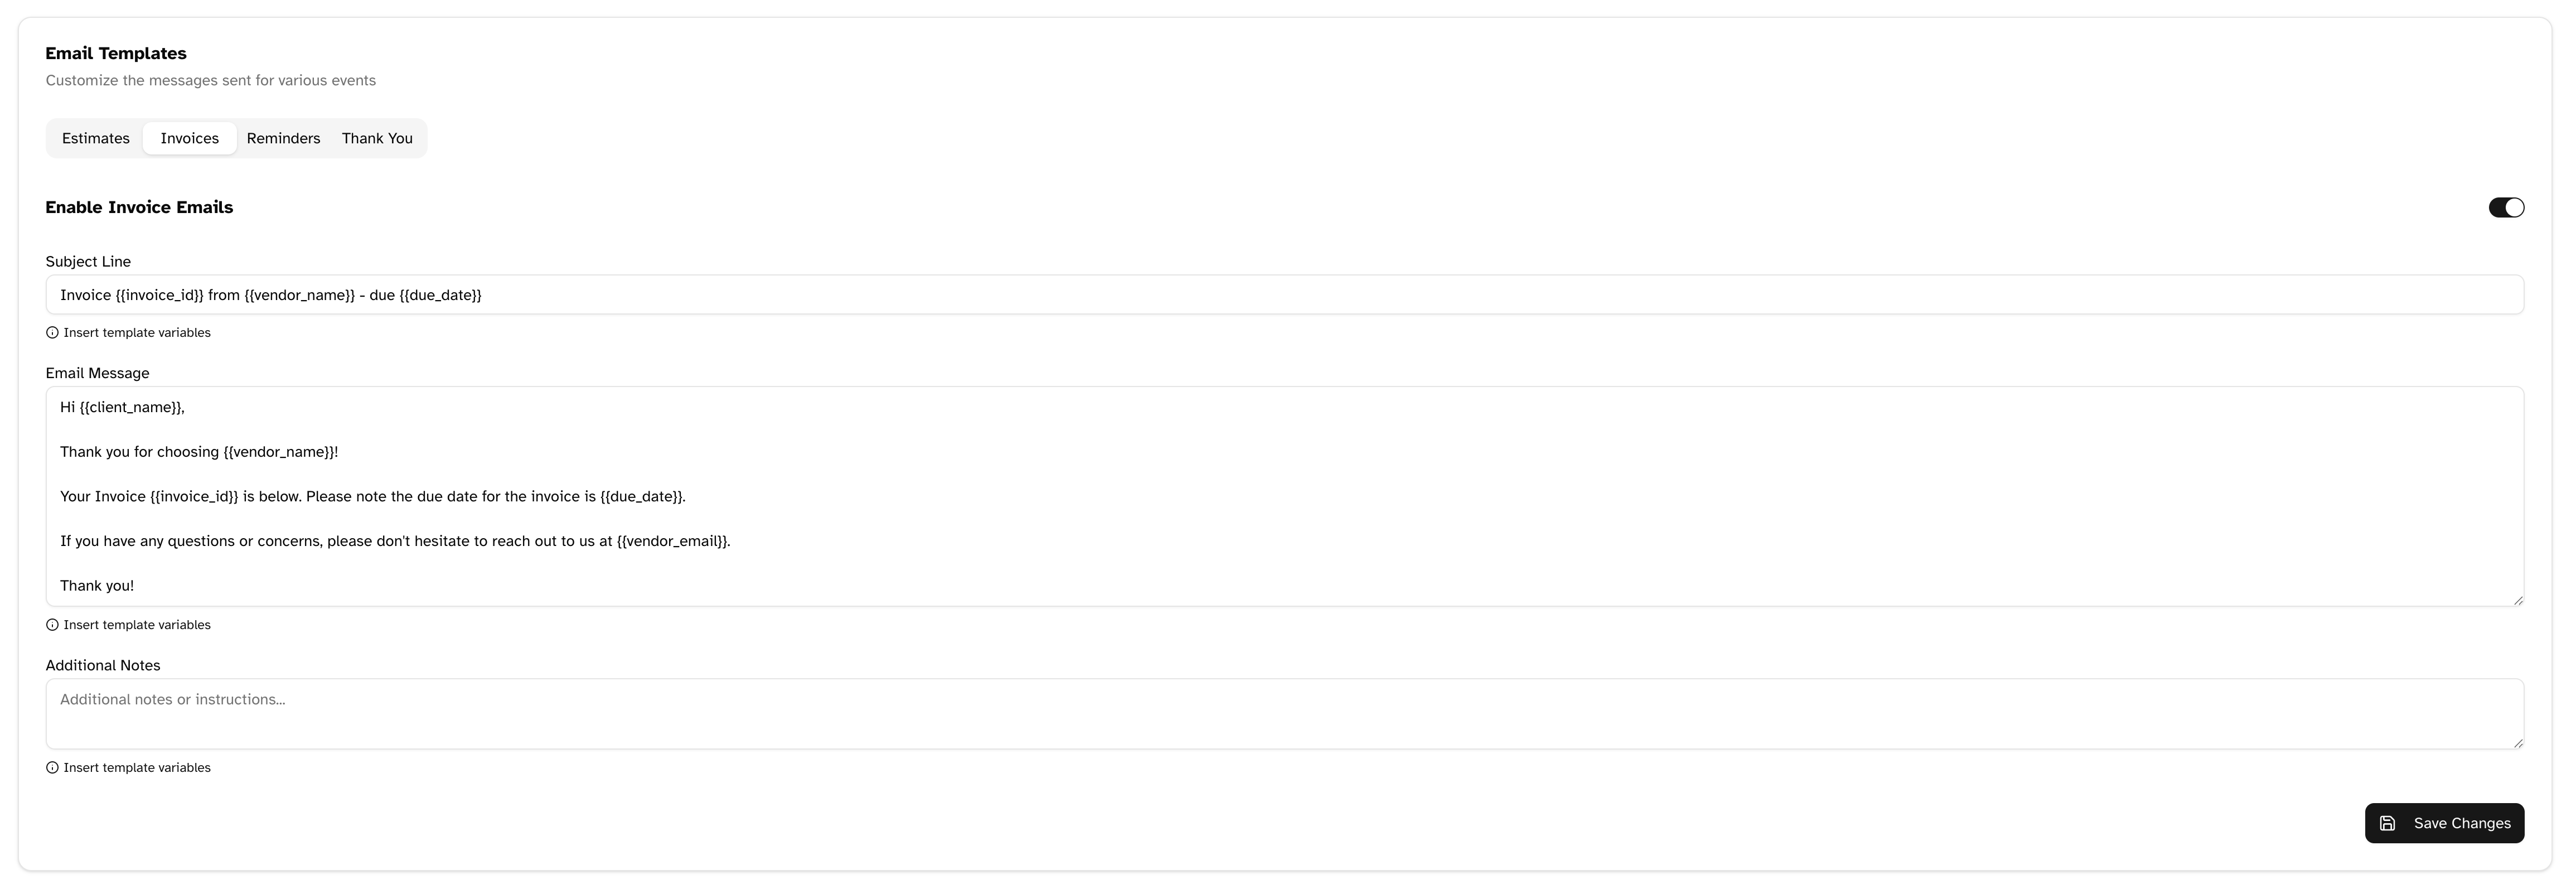
Invoice Messages
These emails accompany new invoices sent to clients, usually containing:- A payment request
- The invoice details
- Payment instructions
- Due date information
- Your contact details
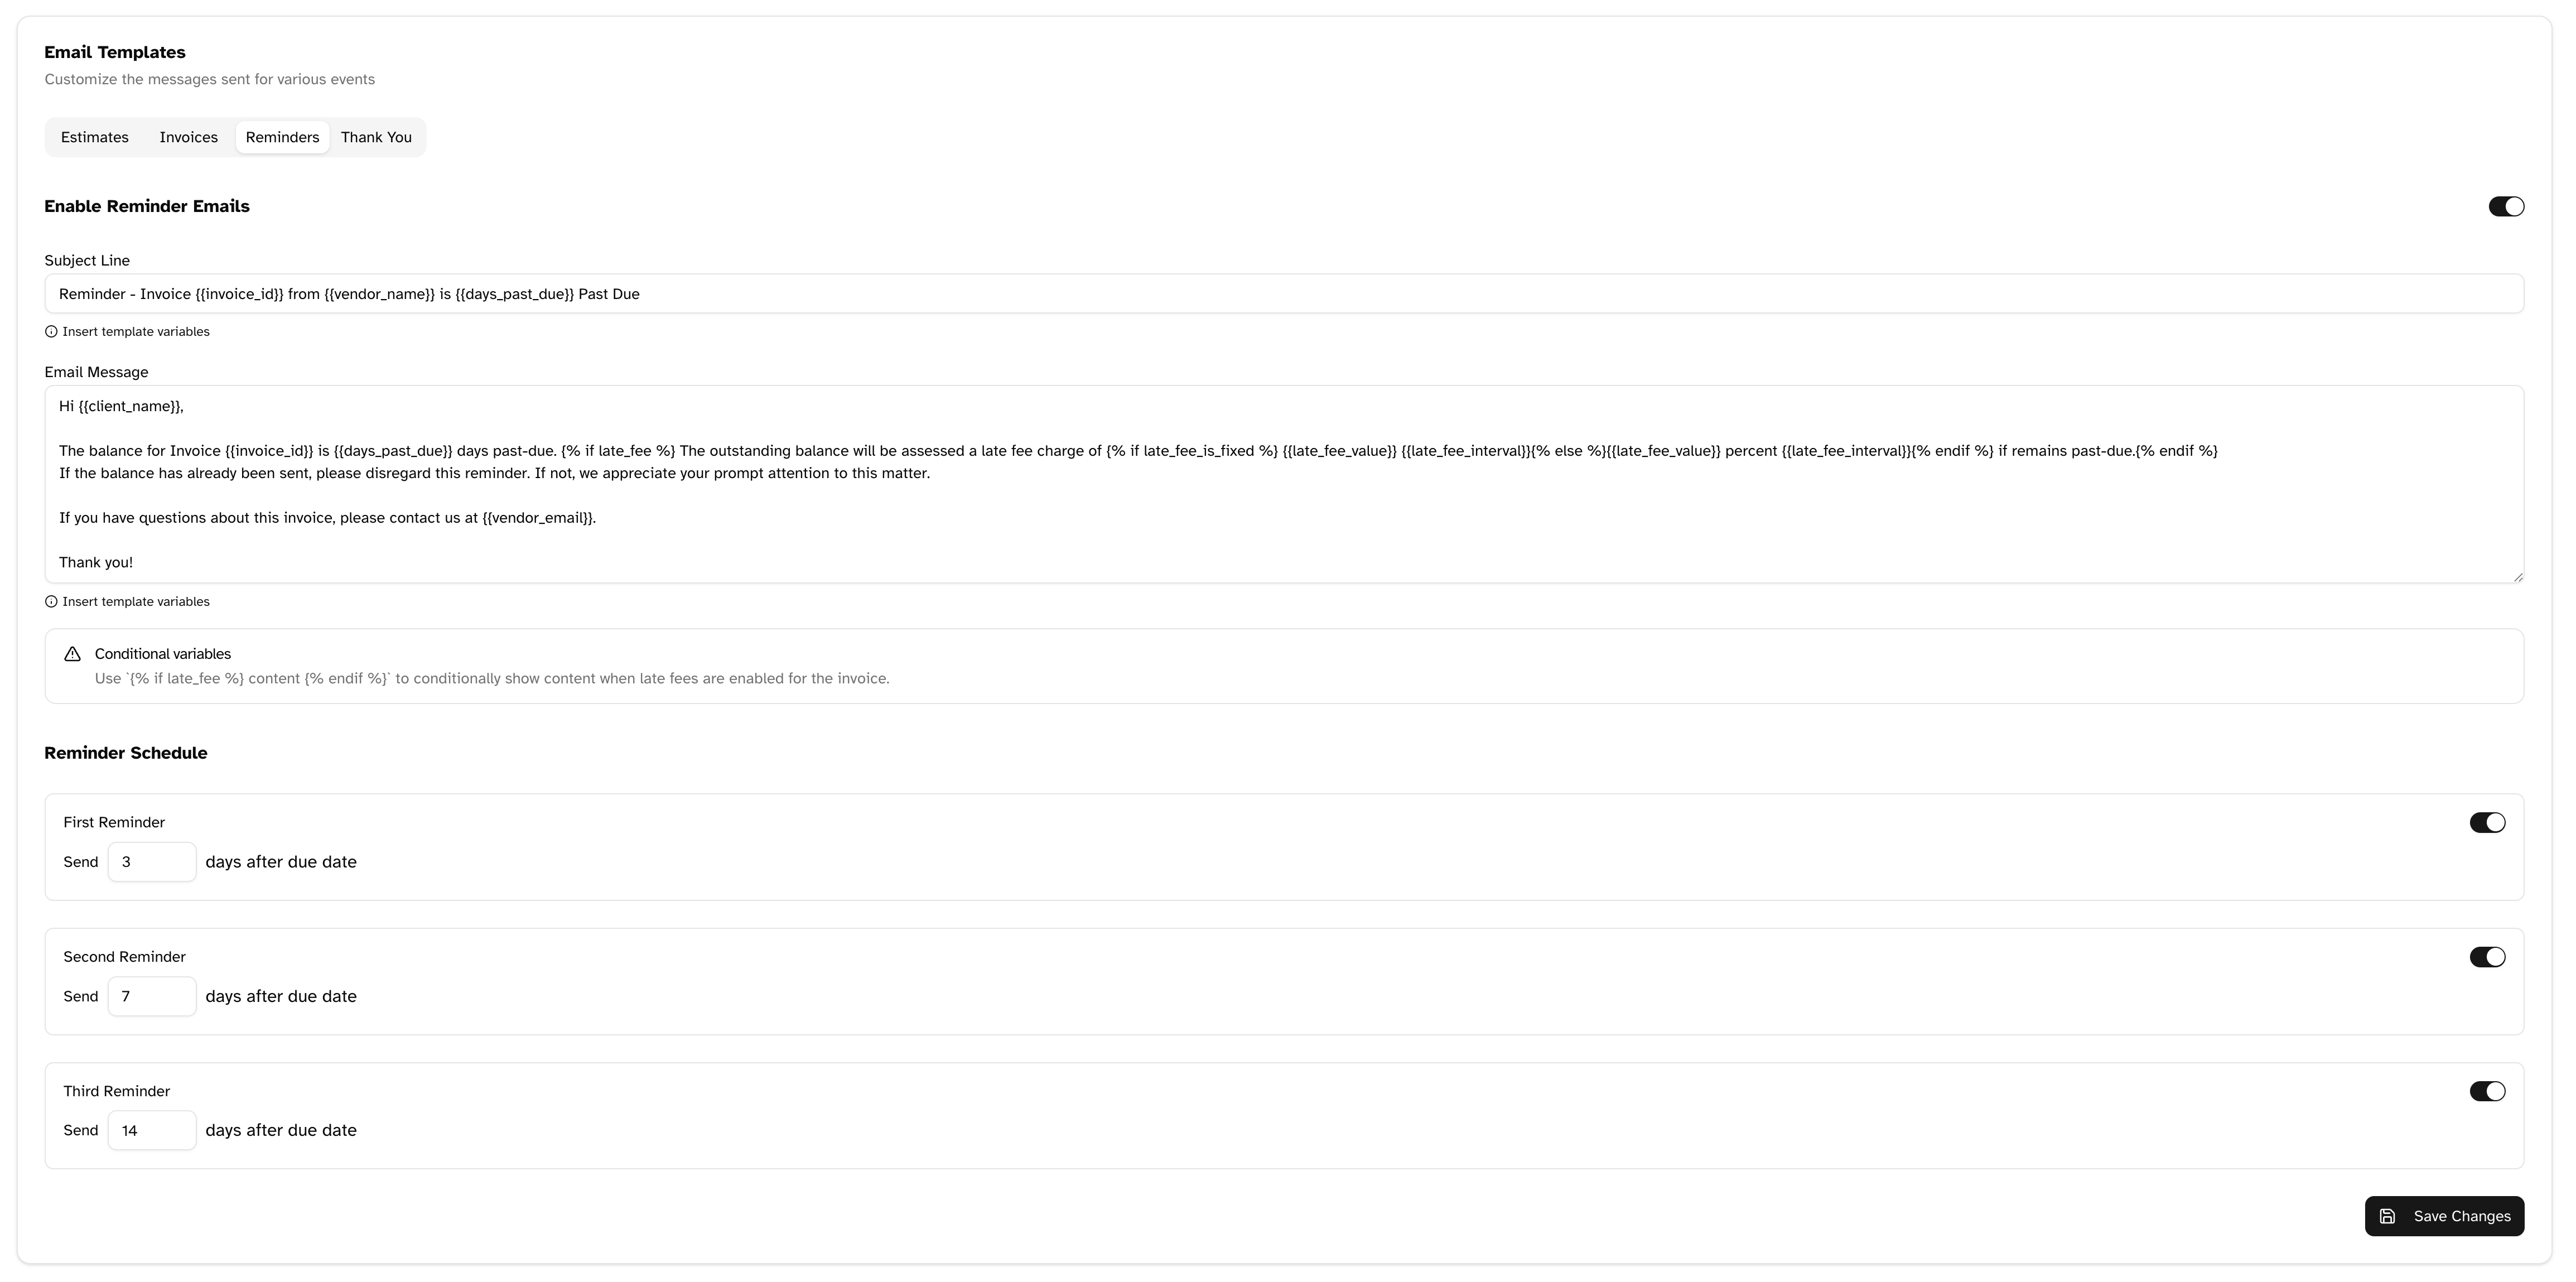
Payment Reminder Messages
These emails automatically remind clients about overdue invoices. They include:- A gentle reminder of the outstanding payment
- Details of the overdue invoice
- Information about any applicable late fees
- Payment instructions
- Your contact information for payment arrangements
Thank You Messages
These emails confirm receipt of payment, typically containing:- A note of appreciation for the payment
- Details of the paid invoice
- Any follow-up information
- An invitation for future business

Customizing Message Templates
Accessing the Message Templates
To customize your automated messages:- Navigate to Settings → Automated Messages
- Select the tab for the message type you want to customize (Estimates, Invoices, Reminders, or Thank You)
- Enable or disable the message type using the toggle switch
- Customize the subject line and message content
- Click Save Changes when finished
Using Template Variables
Template variables allow you to dynamically insert client-specific or document-specific information into your messages. Variables are enclosed in double curly braces, like{{variable_name}}.
To insert a variable:
- Place your cursor where you want the variable to appear
- Click the Variables button below the text field
- Select the variable from the dialog that appears
- The variable will be inserted at your cursor position
Common Template Variables
Conditional Content
For reminder messages, you can use conditional blocks to show content only when certain conditions are met, such as when late fees apply:Configuring Payment Reminders
Payment reminders help you collect payments without manual follow-up. Blinksale allows you to set up to three reminders at different intervals after the due date.Setting Reminder Intervals
For each reminder level:- Enable the reminder using the toggle switch
- Set the number of days after the due date when the reminder should be sent
- The reminder will automatically use your reminder message template
Recommended Reminder Schedule
For effective collections, consider this schedule:- First Reminder: 3 days after due date (gentle reminder)
- Second Reminder: 7-10 days after due date (firm reminder)
- Third Reminder: 14-30 days after due date (final notice)
Best Practices for Automated Messages
Writing Effective Messages
- Be clear and concise: Keep your messages direct and to the point
- Maintain professionalism: Use a cordial tone even in reminder messages
- Include all necessary information: Make sure clients have everything they need to take action
- Provide contact details: Always include a way for clients to reach you with questions
- Brand consistency: Ensure your messaging reflects your brand’s voice and values
Subject Lines
Effective subject lines:- Are concise (under 50 characters if possible)
- Include document identifiers (invoice or estimate numbers)
- State the purpose clearly (e.g., “Payment Due” or “Thank You for Your Payment”)
- Avoid spam trigger words like “urgent” or excessive punctuation
Template Management
- Review regularly: Periodically review and update your templates
- Test your templates: Send test messages to yourself to see how they look
- Use consistent formatting: Maintain similar structure across all message types
- Keep copies of past versions: Before making major changes, save your current templates
Troubleshooting
Common Issues
-
Variables not displaying properly
- Ensure variable names are spelled correctly with proper capitalization
- Check that you’ve enclosed variables in double curly braces:
{{variable_name}} - Some variables are only available for specific message types (e.g.,
{{invoice_id}}won’t work in estimate messages)
-
Conditional content not working
- Verify the syntax:
{% if condition %}and{% endif %}must be properly formatted - Ensure the condition name is correct (e.g.,
late_fee, notlatefee) - Check that there are no extra spaces in the conditional markers
- Verify the syntax:
-
Messages not sending
- Confirm the message type is enabled (toggle switch is on)
- Check that the client has a valid email address
- Verify your domain settings if you’re using a custom email domain
Getting Help
If you encounter issues with automated messages:- Check for proper variable syntax and conditional formatting
- Review your email delivery settings in Domain Settings
- Contact Blinksale support if problems persist